Installation
#Several installation methods are available depending on your operating system. Choose the method that best suits your environment.
For Debian-based operating systems (such as Ubuntu or Debian), the easiest way is to use our APT repository. First, install necessary dependencies and add the repository’s GPG key:
$ sudo apt-get update
$ sudo apt-get install -y curl gnupg2
$ curl -fsSL https://plakar.io/dist/keys/community-v1.1.0.gpg | sudo gpg --dearmor -o /usr/share/keyrings/plakar.gpg
$ echo "deb [signed-by=/usr/share/keyrings/plakar.gpg] https://plakar.io/dist/repos/deb/ stable main" | sudo tee /etc/apt/sources.list.d/plakar.list
Then update the package list and install plakar:
$ sudo apt-get update
$ sudo apt-get install plakar
For operating systems which use RPM-based packages (such as Fedora), the easiest way is to use our DNF repository.
First, set up the repository:
$ cat <<EOF | sudo tee /etc/yum.repos.d/plakar.repo
[plakar]
name=Plakar Repository
baseurl=https://plakar.io/dist/repos/rpm/$(uname -m)/
enabled=1
gpgcheck=0
gpgkey=https://plakar.io/dist/keys/community-v1.1.0.gpg
EOF
Then install plakar with:
$ sudo dnf install plakarThe simplest way to install Plakar on macOS is with Homebrew. Ensure you have Homebrew installed, then add the Plakar tap and install Plakar with:
$ brew install plakarkorp/tap/plakarIf you prefer not to use our tap, you can install from the default Homebrew repository instead with
brew install plakar. Note that the version in the default repository may not always be the latest release.
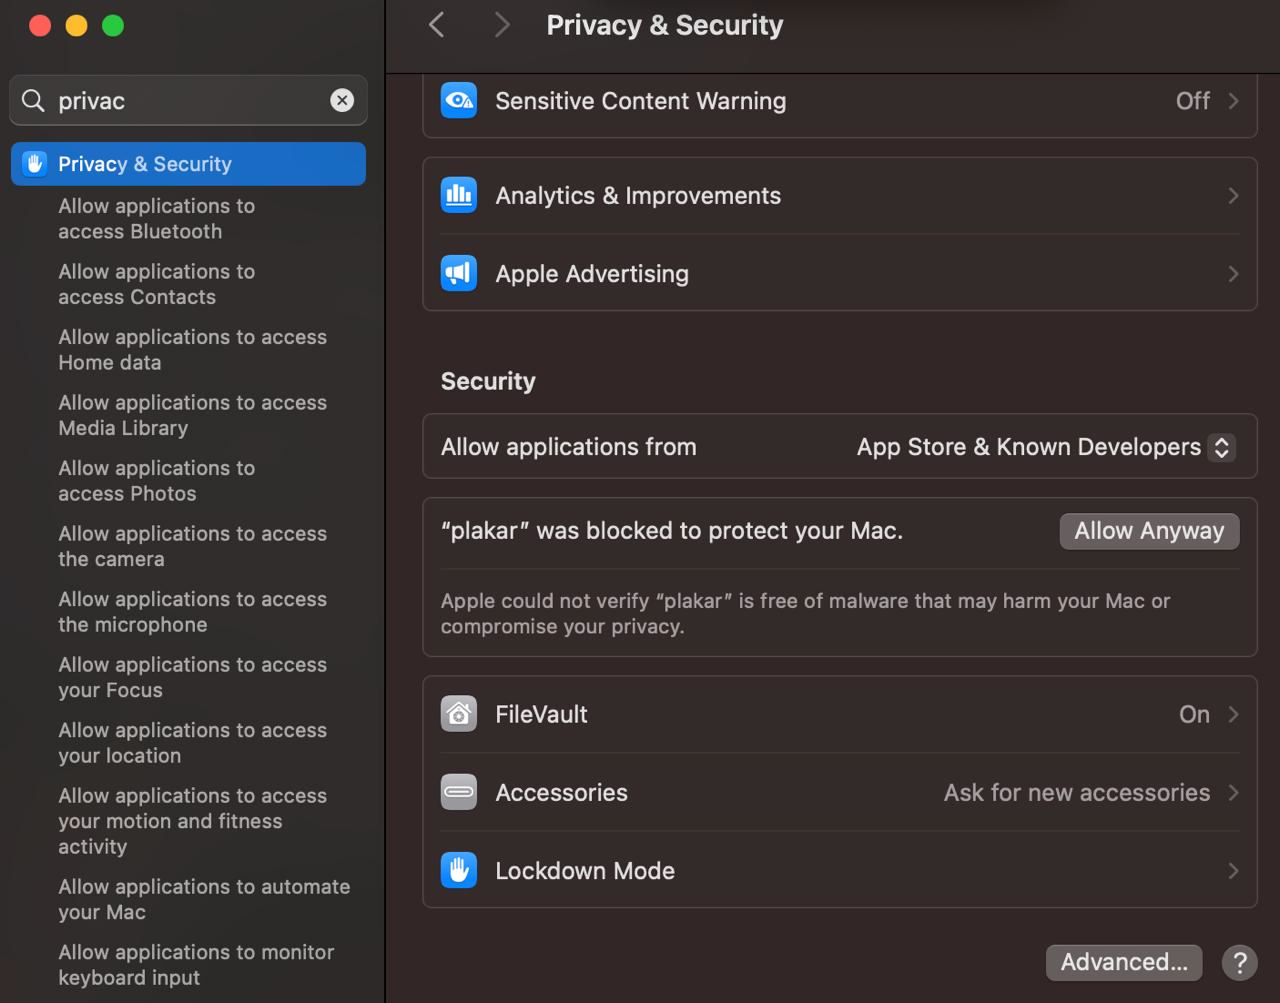
macOS includes built-in protection against untrusted binaries. To allow plakar to run, you will need to explicitly approve it in the Privacy & Security settings.
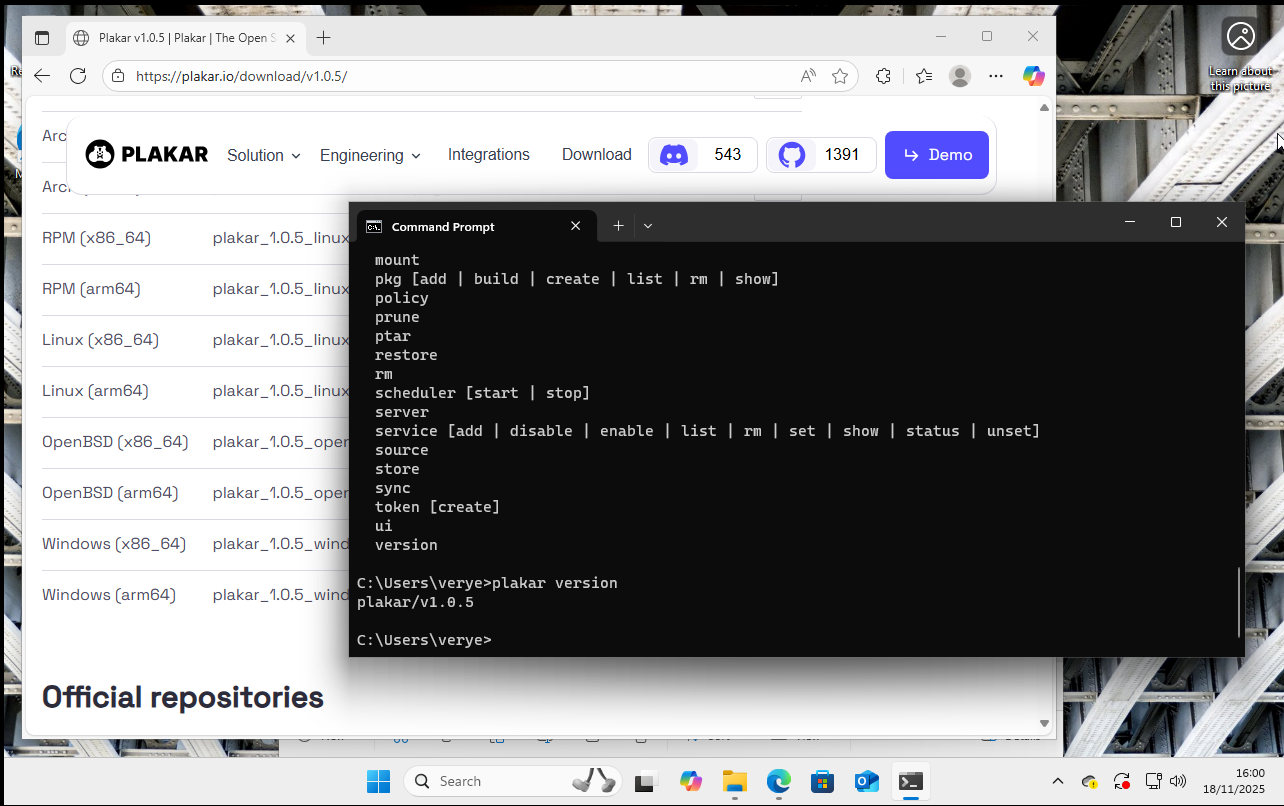
The simplest way to install Plakar on Windows is by downloading the pre-built package from the Download page.
The downloaded package is simply an archive containing the executable. Copy this to anywhere on your system PATH, or run it directly from a shell where it is installed.
To install using the Go toolchain, use go install with the version you want to
install, or latest:
$ go install "github.com/PlakarKorp/plakar@v1.1.3"This will install the binary into your $GOPATH/bin directory, which you may
need to add to your $PATH if it is not already there.
Arch Linux
#Plakar is available on the Arch User Repository (AUR). If you use an AUR helper
such as yay, you can install it with:
$ yay -S plakarBuilding from Source
#You can build Plakar from source. You will need:
- Go (Golang)
make(available by default on most Linux distributions; on macOS, install the Xcode command line tools withxcode-select --install; on Windows, use WSL or a tool like GnuWin32 Make)
Clone the repository and run make:
$ git clone https://github.com/PlakarKorp/plakar.git
$ cd plakar
$ make
This produces a plakar binary in the current directory. To build a specific
release version, check out the corresponding tag before running make:
$ git fetch --tags
$ git checkout tags/v1.1.3
$ make
Other Platforms
#For other supported operating systems, or for an alternative to the methods mentioned above, it is possible to download pre-built binaries for different platforms and architectures from the Download page.
These are in standard formats for the relevant platforms, so consult OS-specific documentation for how to install them.
Verifying the Installation
#Verify the installation by running:
$ plakar versionThis should return the expected version number, for example plakar/v1.1.3.
Downloading Specific Versions
#All release versions of Plakar are available directly from GitHub on the project’s release page.
For each release, check under the “Assets” section for a list of pre-built
packages. They follow the naming convention
plakar_<version>_<os>_<arch>.<format>.
Upgrading
#If you have Kloset stores created with an older version of Plakar, the updated binary is fully backward compatible and will read and write them without any changes required on your part.
That said, some improvements in this release depend on a new on-disk store format. Existing Kloset stores are not migrated automatically, so to take advantage of those improvements you will need to create a new store and sync your data into it:
$ plakar at /path/to/new-store create
$ plakar at /path/to/new-store sync from /path/to/old-store
Once the sync is complete, update your backup configuration to point at the new store. Keep the old store until you are satisfied everything is in order. Migration is optional and your existing store will continue to work normally.
Upgrading packages
#If you use integrations such as SFTP or S3, upgrade them to link against the latest SDK. To upgrade a specific package:
$ plakar pkg add -u s3To upgrade all installed packages at once:
$ plakar pkg add -uPackage upgrades preserve existing store, source, and destination configurations.
Installation Troubleshooting
#If you encounter any issues during installation:
- Ensure you are following the instructions for the correct version of plakar.
- Open an issue on the GitHub issue tracker.
- Ask for help on the Discord server.
Next Steps: Getting Started
#Now that you have Plakar installed, we recommend proceeding to the Quickstart guide to set up your first backup.