Using Exoscale Compute as a Dedicated Backup Server
This guide configures an Exoscale Compute instance to automatically back up your servers to Exoscale Object Storage (SOS). The setup uses Plakar to create encrypted, deduplicated snapshots on a scheduled interval with web UI monitoring.
Architecture
- Backup Compute: Runs Plakar and schedules backups
- Source servers: Exoscale servers to back up
- Exoscale Object Storage (SOS): Stores encrypted backups
flowchart TB
subgraph Sources["Source Servers"]
  Server1["Web Server 1"]
  Server2["Web Server 2"]
  ServerN["Server N"]
end

BackupCompute["Backup Compute
Plakar + Scheduler"]

subgraph Storage["Exoscale Object Storage"]
  Kloset["Kloset Store
Encrypted & Deduplicated
Backup"]
end

Server1 -->|SSH/SFTP| BackupCompute
Server2 -->|SSH/SFTP| BackupCompute
ServerN -->|SSH/SFTP| BackupCompute
BackupCompute -->|Store Snapshots| Kloset
Prerequisites
- Exoscale account with billing configured
- SSH keypair for instance access
- SSH access to source servers
- Basic familiarity with Plakar commands
Create Object Storage Bucket
Create bucket in Exoscale Portal
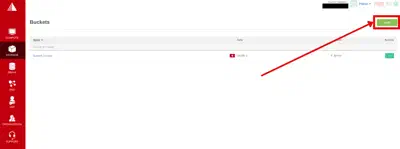
- In the Exoscale portal, navigate to Storage
- Click Add to create a new bucket
- Configure:
- Zone: Select region (note the name, it’ll be used to connect to the
container e.g
ch-dk-2) - Name:
plakar-backups(must be globally unique)
- Zone: Select region (note the name, it’ll be used to connect to the
container e.g
- Click Add
Generate IAM API Keys
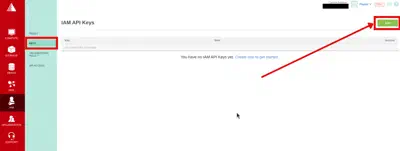
- In the Exoscale portal, navigate to IAM → Keys
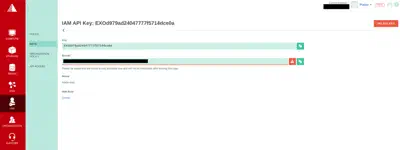
- Click on Add to create new API keys, then provide a name and role, then click Create.
- Copy the key and secret to a secure environment (you cannot see the secret once you leave the page)
Create SSH Keypair
- Generate SSH key locally and copy the public key:
$ ssh-keygen -t ed25519 -f ~/.ssh/id_exoscale -C "exoscale-backup"
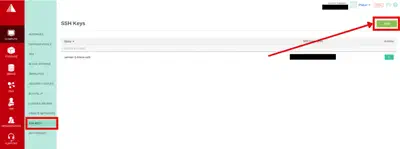
$ cat ~/.ssh/id_exoscale.pub- In the Exoscale portal, navigate to Compute → SSH Keys
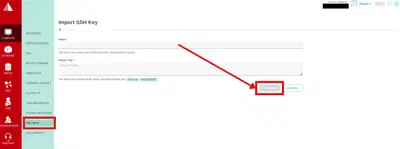
- Click on Add then enter a name for the SSH Key and paste in the public key then click Import.
Provision Backup Compute Instance
Create compute instance
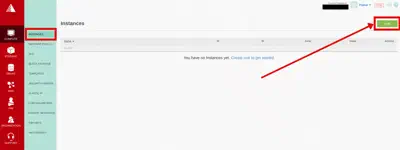
- In the Exoscale Portal, navigate to Compute → Instances
- Click Add
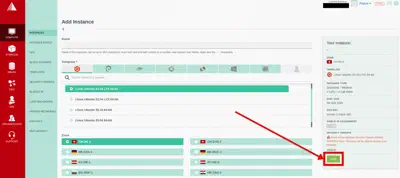
- Configure:
- Name:
plakar-backup - Template: Ubuntu 24.04 LTS
- Zone: Same as Object Storage bucket (recommended for better performance)
- Instance Type: Small (2 vCPUs, 2 GB RAM) or any other you prefer
- SSH Key: Select the SSH key we created before from the dropdown
- Name:
- Click Add to provision your compute
Setup security group rules
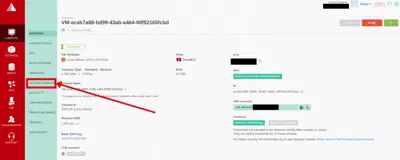
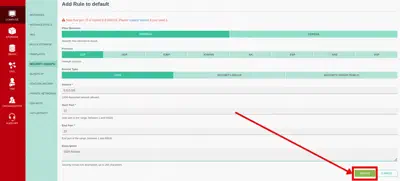
- Once the compute is provisioned, navigate to Compute → Security Groups
- By default the compute will be assigned the
defaultsecurity group, click on the actions on default then click on Details - On the next page click on Add Rule
- Configure:
- Flow direction: Ingress
- Protocol: TCP
- Source Type: CIDR
- Sources:
0.0.0.0/0allows SSH from anywhere (for better security use your IP Address here) - Start & End port: 22
- A description for the rule e.g. SSH Access
- Click on Create
Initial connection
Once instance is running, note the public IP and connect:
$ ssh ubuntu@<instance-ip>Install Plakar
Install Plakar on the instance using the Plakar Installation Guide
Configure Object Storage
Install S3 integration
$ plakar login -email you@example.com
$ plakar pkg add s3
Add storage connector
$ plakar store add exoscale-sos-backups \
  location=s3://<SOS_ENDPOINT>/<BUCKET_NAME> \
  access_key=<YOUR_ACCESS_KEY> \
  secret_access_key=<YOUR_SECRET_KEY> \
  use_tls=true \
  passphrase='<YOUR_SECURE_PASSPHRASE>'
Replace:
<SOS_ENDPOINT>: using the formatsos-{zone}.exo.iowhere zone is one we selected for the bucket e.gsos-ch-dk-2.exo.io<BUCKET_NAME>: e.g.,plakar-backups<YOUR_ACCESS_KEY>and<YOUR_SECRET_KEY>: From bucket API credentials<YOUR_SECURE_PASSPHRASE>: Strong passphrase for encryption
Note
Passphrase Configuring the passphrase in the store enables automated backups without prompts.
Initialize Kloset Store
$ plakar at "@exoscale-sos-backups" createConfigure SSH Access to Source Servers
Install SFTP integration
$ plakar pkg add sftpGenerate SSH keys for backups
$ ssh-keygen -t ed25519 -f ~/.ssh/id_ed25519_plakar -C "plakar@backup"Press Enter for no passphrase.
Copy keys to source servers
$ ssh-copy-id -i ~/.ssh/id_ed25519_plakar.pub user@source-server-1
$ ssh-copy-id -i ~/.ssh/id_ed25519_plakar.pub user@source-server-2
Test access:
$ ssh -i ~/.ssh/id_ed25519_plakar user@source-server-1 'echo "Success"'Create SSH aliases
$ cat >> ~/.ssh/config << 'EOF'
Host source-1
  HostName source-server-1.example.com
  User backupuser
  Port 22
  IdentityFile ~/.ssh/id_ed25519_plakar

Host source-2
  HostName source-server-2.example.com
  User backupuser
  Port 22
  IdentityFile ~/.ssh/id_ed25519_plakar
EOF
Test:
$ ssh source-1 'echo "Alias works"'Configure Backup Sources
Add source connectors for each server:
$ plakar source add web-server-1 sftp://source-1/var/www
$ plakar source add web-server-2 sftp://source-2/var/www
Verify:
$ plakar source showTest Backup
Run a manual backup to verify configuration:
# Single source
$ plakar at "@exoscale-sos-backups" backup "@web-server-1"

# Multiple sources
$ plakar at "@exoscale-sos-backups" backup "@web-server-1" "@web-server-2"
List snapshots:
$ plakar at "@exoscale-sos-backups" lsSchedule Automatic Backups
For scheduler configuration and systemd service setup, follow the same steps as the OVHcloud backup server guide, replacing:
@ovhcloud-s3-backupswith@exoscale-sos-backupsubuntuwith your actual username if different
The scheduler configuration, systemd services, and web UI setup are identical on any Linux machine.
Troubleshooting
Authentication errors
- Verify SSH keys and user permissions on source servers
Can’t connect to Object Storage
- Check S3 credentials and endpoint URL
- Verify passphrase:
plakar store show exoscale-sos-backups - Confirm bucket name and zone endpoint match
Permission denied
- Ensure SSH user has read access to backup directories
Services won’t start
- Check status:
systemctl status plakar-scheduler - View logs:
journalctl -u plakar-schedulerorjournalctl -u plakar-ui
Alternative UI access
- Install Plakar locally and configure the same store with Exoscale SOS credentials to access backups without compute instance connection